Thrifty DIY: Painted Wood Bowls
DIY Painted Wood Bowls
Were you all wondering what happened to me? I promise I haven’t forgotten about blogging, but instead have been very busy working on projects behind the scenes! Of course, that hasn’t stopped me from finding time to hit up the Goodwill for my latest Thrifty DIY!
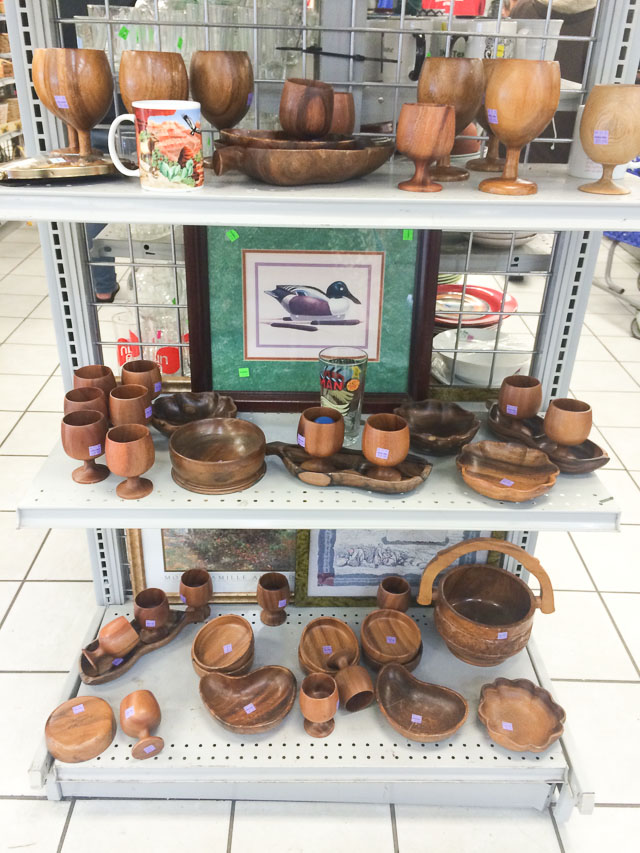
If you’re a thrift store regular, I bet you’ve seen these wood bowls. I think many of them were popular Hawaiian souvenirs back in the 60s? Correct me if I’m wrong! Well, prices can vary but I was able to score these guys for a mere 99 cents a piece!
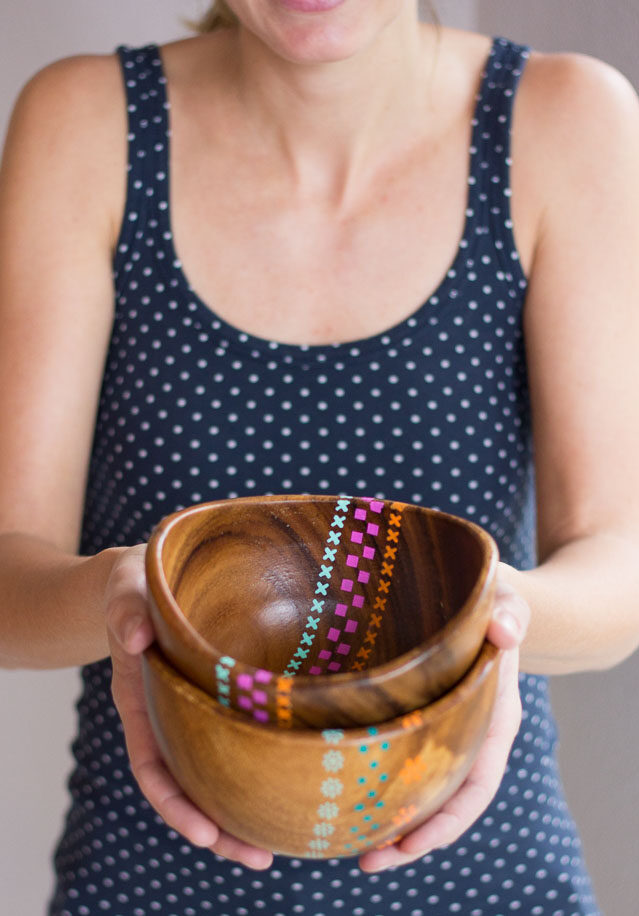
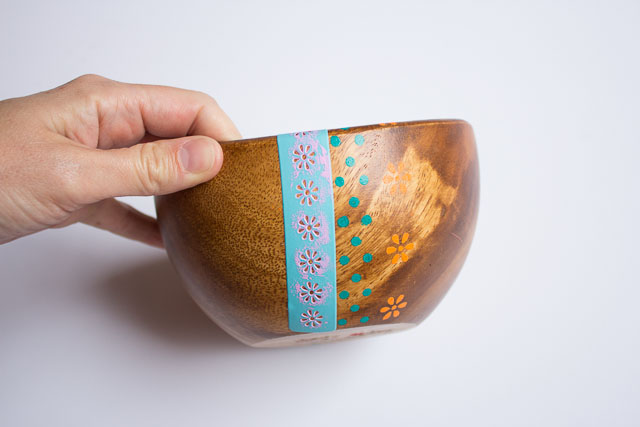
Although pretty as is, I decided they could benefit from a little more color (I mean, couldn’t everything?!). I love the juxtaposition of bare wood with just a pop of bold color. Remember these pom-pom shadow boxes with a similar effect?
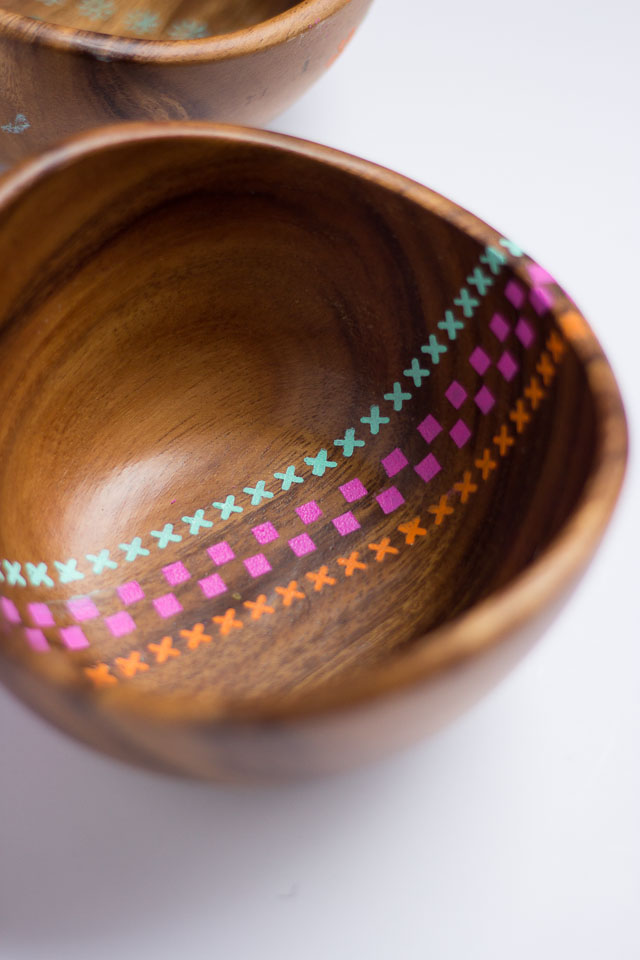
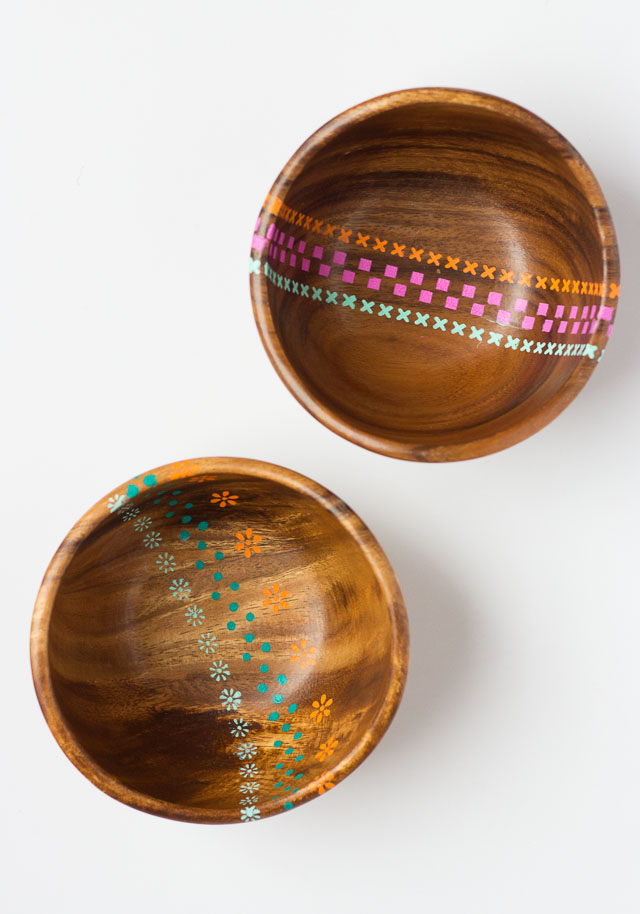
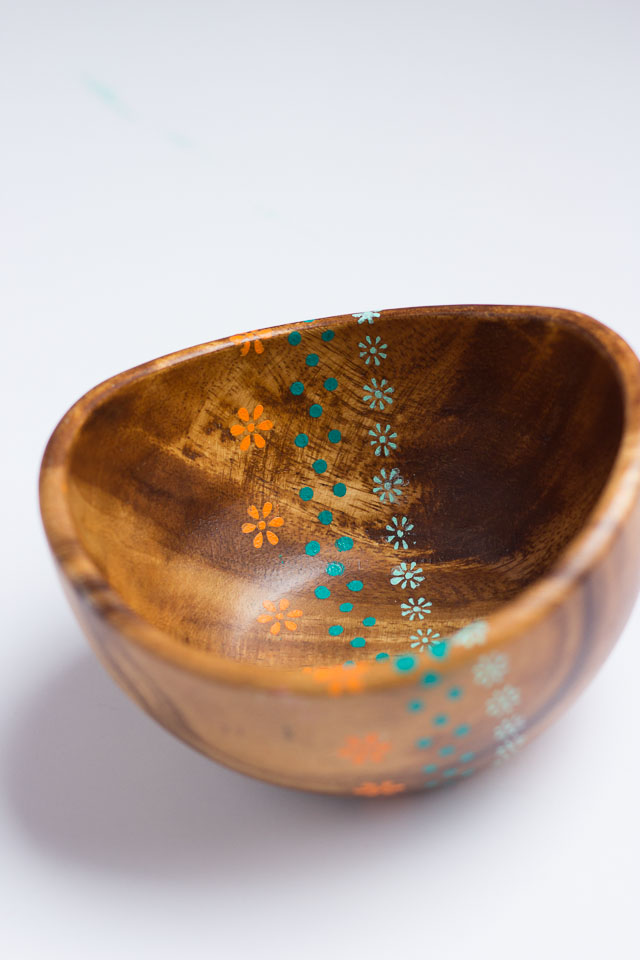
Adhesive stencils from Martha Stewart Crafts made it simple to add these intricate lines of patterns. These stencils work awesome on any curved surface. I even used them to decorate Easter eggs last year!
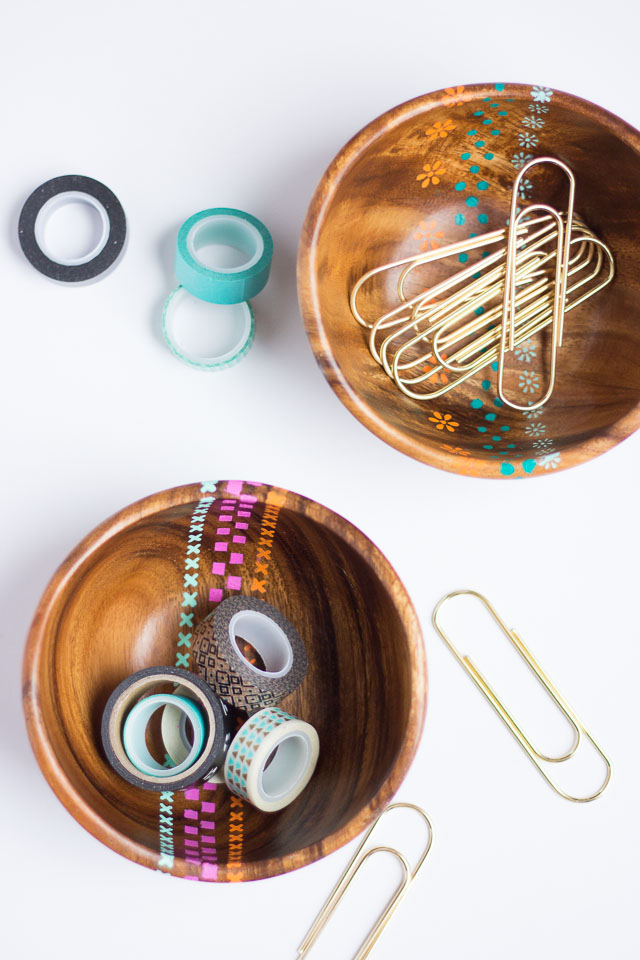
I ran three rows of different patterns down the middle of each bowl. The lighter colors really popped best against the dark wood bowls.
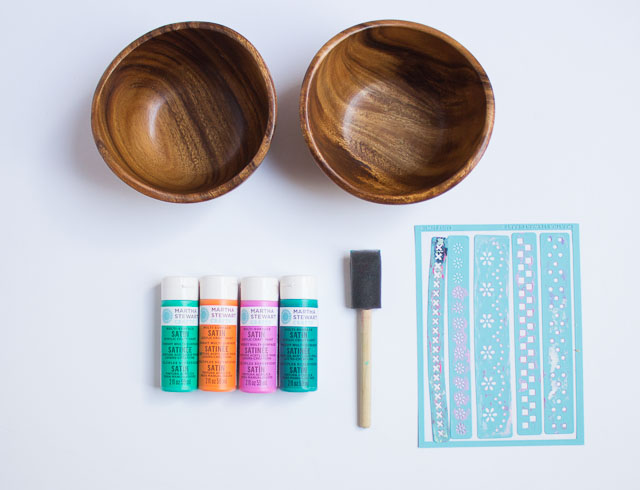
Supplies for Painted Wooden Bowls
- Wood bowls from the thrift store
- Martha Stewart adhesive stencils
- Martha Stewart multi-surface craft paint
- Foam brush
Here’s proof that your local thrift store is bound to have some wooden pieces on hand. The last time I stopped by the Goodwill there was a full display of them!
How to Make Paint Wood Bowls
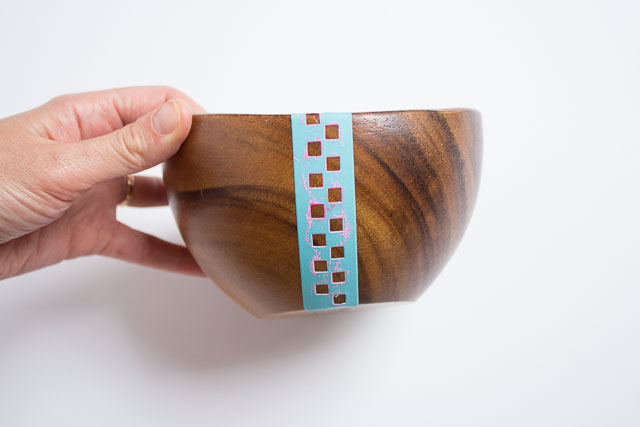
1. Position adhesive stencil
Place your adhesive stencil where you want it on the bowl. I started mine along the side and wrapped it over the top. Use your fingernail to smooth down the stencil to prevent any paint from seeping underneath.
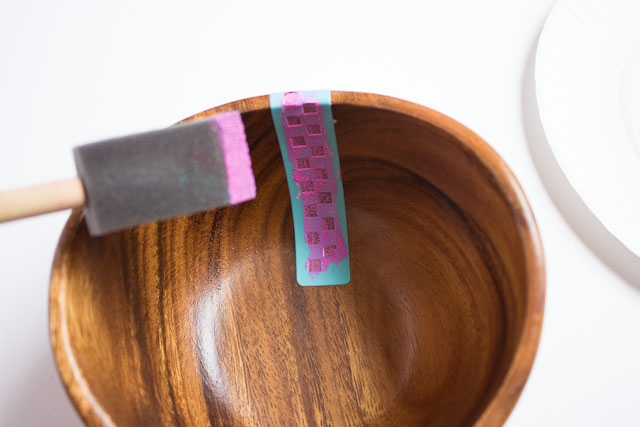
2. Dab paint onto stencil
Use your foam brush to apply a thin coat of paint. Let dry to the touch (15-20 min) and add a second coat. Then peel of the stencil and continue moving it down the bowl until you’ve covered the area you want.
If you’re a messy painter like me, I recommend keeping a damp rag or paper towel and a few q-tips by your side for any quick clean up of smudges or extra paint on the bowl or your fingers. It will wipe right off when it is wet, and you want to catch any mistakes before they dry!
Step 3. Add additional rows
I lined up the subsequent lines by making sure the stencil ran straight along the previous line. Add as many rows as you want, letting each row dry before starting the next! There is quite a bit of drying time involved in this project so it is a good one to while you’re multi-tasking on something else. 😉
While I wouldn’t put food in these bowls, they make great catchalls on your desk or coffee table!
This post is written in support of the Goodwill San Antonio. All content and opinions are my own.

Hello,
I am asking for permission to use one of your images (painted wooden bowls) to use for my small art studio. I would ensure that you are credited for the image (and it will provide publicity for your website).
Just wanting to ensure due diligence!
Thanks! Sue
Hi Suzette – thanks so much for asking! Your are welcome to use one image with a link back to Design Improvised for the tutorial. Thanks so much for sharing!