Industrial Pipe and Wood Shelves – Tips and Tricks
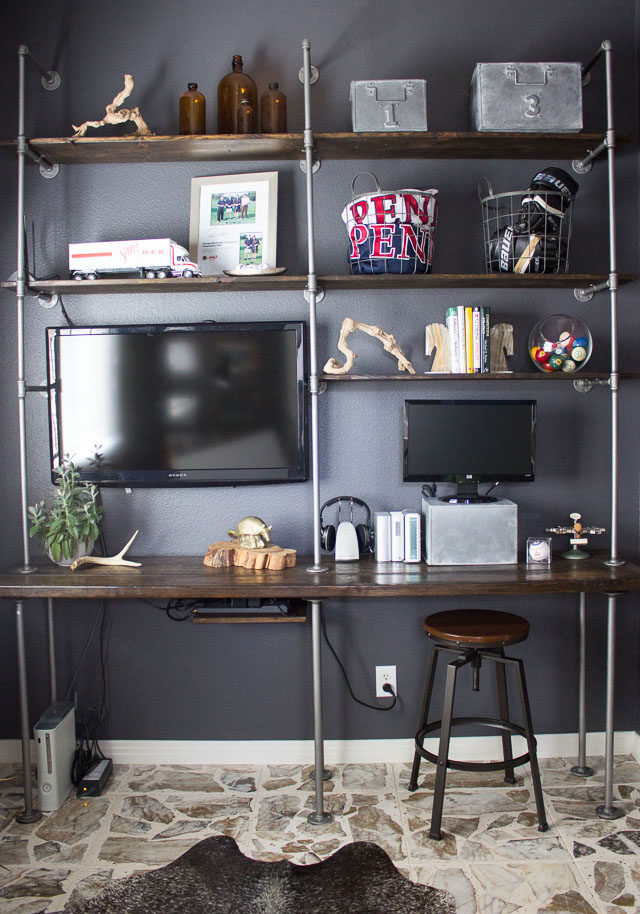
DIY Industrial Pipe and Wood Shelves
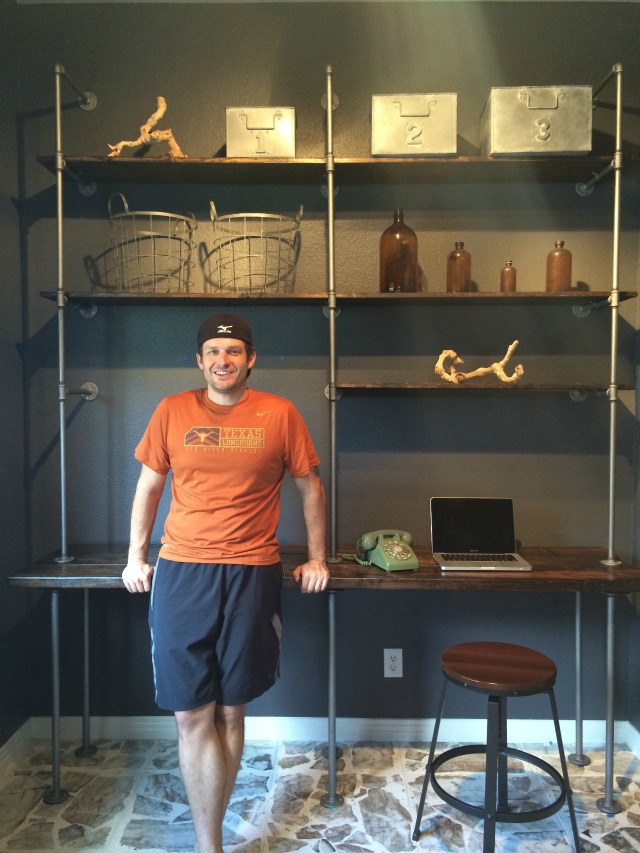
We recently finished Ross’s man cave – a project that had lingered for months, but is finally complete! These DIY pipe and wood shelves were the biggest undertaking in the room, but also the thing that made it AWESOME!
Helpful Pipe Shelf Tutorials
Several versions of these shelves have been done before by talented DIY bloggers, so rather than rehash the same tutorials, we wanted to direct you to the couple that we found most helpful and provide you with some additional tips and tricks along the way:
-
Industrial rustic shelf tutorial at Sylvie Liv – Ross found this to be the most comprehensive and helpful.
-
This iron pipe shoe rack tutorial is also very helpful.
Check out both of these for step-by-step photos and be sure to keep Ross’s tips below in mind as you go along.
Tips for Designing Your Pipe and Wood Shelves
Ross sketched out a design for the shelves and made a number of careful measurements before he got started. Here’s his tips:
1. Plan the Design Carefully
Dedicate a good amount of time to the design phase before you get started. Think about how you are trying to use the space and how you’ll space out the shelving and supports. Do you want a desk to be a certain height? Are you trying to fit certain storage pieces between the shelves?
- I needed space for a TV and a workstation, so that dictated some of the minimum dimensions of the width of the shelving unit. As for depth, I knew I wanted a substantial work surface on the bottom and shelves deep enough for books
- The room has very high ceilings so I intentionally built the shelves higher than an average person can reach so that they didn’t look dwarfed by the height of the ceiling.
2. Determine Best Lumber Dimensions
Measure all types of lumber to figure out what sizes will give you the best dimensions. Treat this like a custom project vs. taking someone else’s dimensions and trying to fit it into your space. If you’re going to invest the time in building something like this you want it to truly meet your needs.
Tips for Prepping Pipes for Your Shelves
1. Give pipes a silver metallic finish
The pipes start out with a black coating. To give them this metallic silver finish, Ross scrubbed them down with vinegar and a brillo pad to remove the coating. Then he rinsed them off and let them dry completely before giving them a couple coats of Rustoleum Metallic Hammered Silver paint.
2. Use standard lengths of pipe
Plan on using standard lengths of galvanized pipe (12″, 18″, etc). Some tutorials say you can get the associates at Lowe’s or Home Depot to cut and thread to length but it’s really too much trouble and they can’t do lengths shorter than 12″.
3. Avoid having to run pipe through wood shelf
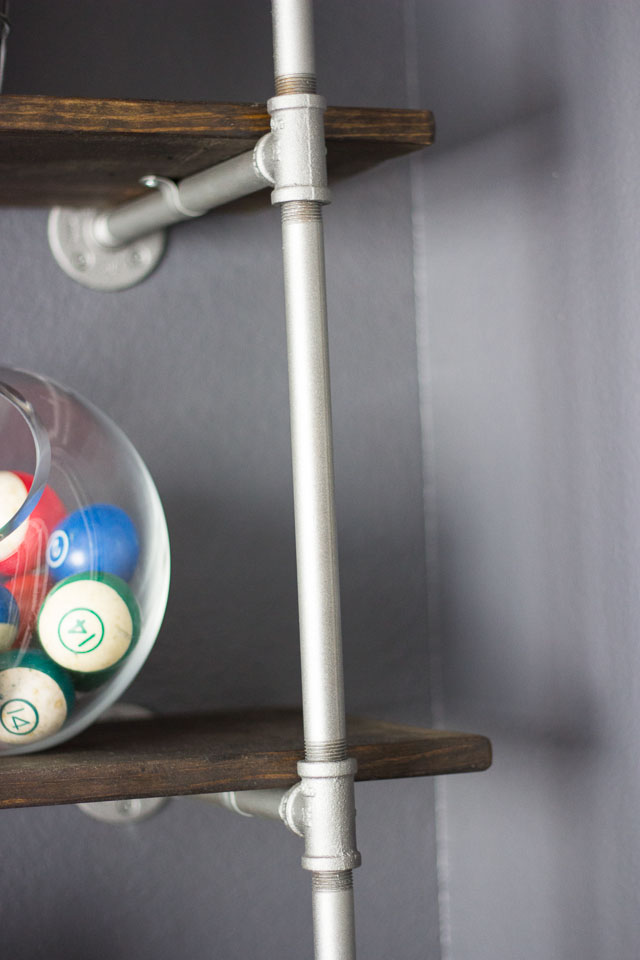
There are a variety of designs that require a hole to be drilled in the shelf and for the pipe to pass through it. I thought this required a level of precision with the boards and with the pipes that I wasn’t ready for… so I elected to use a design similar to the Sylvie Live tutorial where the shelves rest on the pipes for support rather than have the pipe pass through it.
4. Save money buying pipe fittings online
Galvanized metal fittings can be expensive once you start adding up the number of flanges, elbows, and tees needed for the project. Try buying them online from Hardware World as opposed to your local hardware store. I saved ~$50 by doing this… and since there are some standard sizes to all of these pieces you’re guaranteed that it will fit anything you buy at your local store. I purchased all of the pipe lengths locally.
5. Paint pipes with an industrial steel finish
To paint the pipes and fittings, I found some helpful instructions on the Lowe’s site. There are several cool finish options but I went with the one called Industrial Steel. You’ll definitely want to follow the step where you put the screws in the painters tape and spray paint them the same color as the rest of the hardware.
I ended up using 3/4″ pipe for the base supports and 1/2″ pipe for the upper shelving. If you want a more substantial and heavy duty look, I’d recommend using 1″ pipe on the bottom and 3/4″ pipe throughout.
Tips for Prepping the Wood Shelves
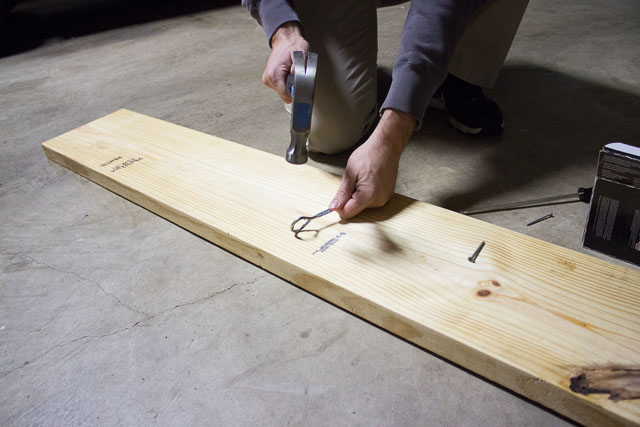
If you happen to have reclaimed wood, awesome! If not you can make it. Just expect to burn some calories doing so. After figuring out the type of wood he wanted to use, Ross spent an afternoon banging on the wood in the garage with a hammer and other random tools before staining and sealing it.
1. Go with Southern Yellow Pine
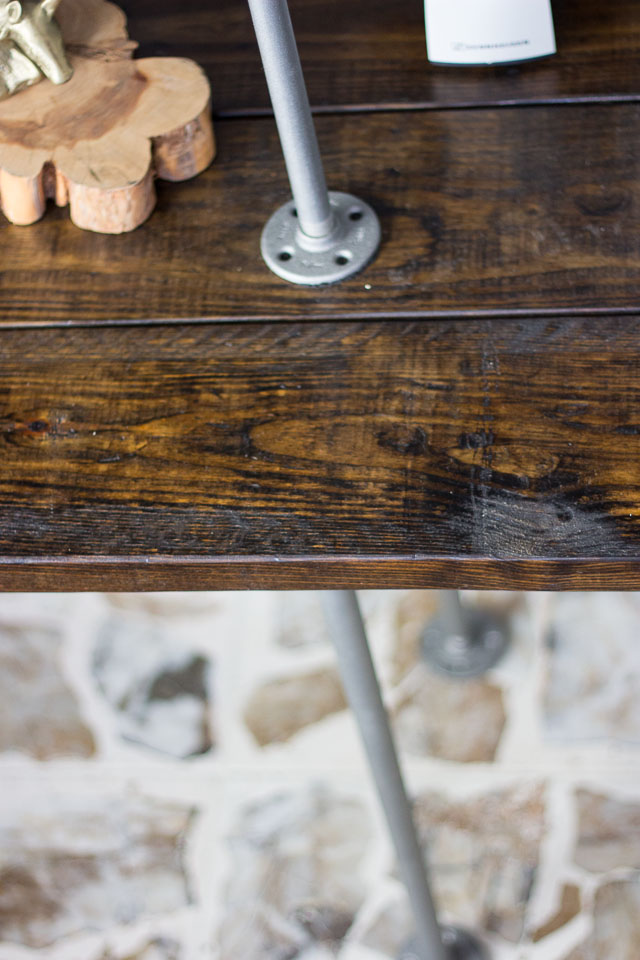
A couple trips to the local home improvement store were made to scope out the different types of wood. I settled on using Southern Yellow Pine for the main part of the shelving unit. I was really happy with how much grain showed up once it was stained and how the distressing gave it a lot more character.
If you have the right tools at home you can cut the boards yourself. Otherwise you can get the boards cut for you at the home improvement store at a nominal cost.
2. Distress the wood with some elbow grease
I mostly followed this wood distressing tutorial from Young House Love. I used a combo of hammers, nails, paint can openers, and screw drivers to give it some character. Try hammering in the long edges of the boards as well to give them some character. If it’s too square it will not look genuine.
3. Wipe off stain quickly
After a light sanding, I applied a single coat of Minwax Dark Walnut stain… you’ll have to be careful to wipe it off fairly quickly after applying. I applied several coats of satin polyurethane to give it a nice finish.
Tips for Assembling Your Pipe and Wood Shelves
You’ll definitely need an extra set of hands to help with the assembly. Thankfully Ross’s dad was able to help one weekend while he was in town!
1. Make sure to use a carpenter’s level
It’s fairly tricky to get the whole thing square (work table perfectly horizontal and supports perfectly vertical). You’ll want a good carpenter’s level to ensure that the installation is square. If you don’t get it perfect on the first try, there’s a good amount of wiggle room in how things are screwed together and how the pipes connect to the flanges… so it’s somewhat forgiving if you’re off by a bit.
2. Use drywall anchors
I knew I couldn’t use any of the studs in the wall… so I was a bit worried about connecting the flanges into the drywall. For each flange (which has 4 screws) I used drywall anchors rated for 100 lb in 2 of the holes and heavy screws for the other 2 holes. It’s solidly attached to the wall and didn’t require me to put anchors in every hole.
I found myself spending the bulk of the time getting the pieces in the right spot and marking the holes. The actually drilling and installation was pretty easy.
So what do you think, are you up for the challenge of making your own? A big thanks to Ross for typing up all these tips!