DIY Paper Fringe Garland for Your Christmas Tree

DIY Paper Fringe Garland
Do you want to give your tree a last minute handmade touch? Then I have the project for you! I made a DIY tissue paper fringe garland to deck our tree in just a few minutes with the help of a cool fringe cutter from Martha Stewart.

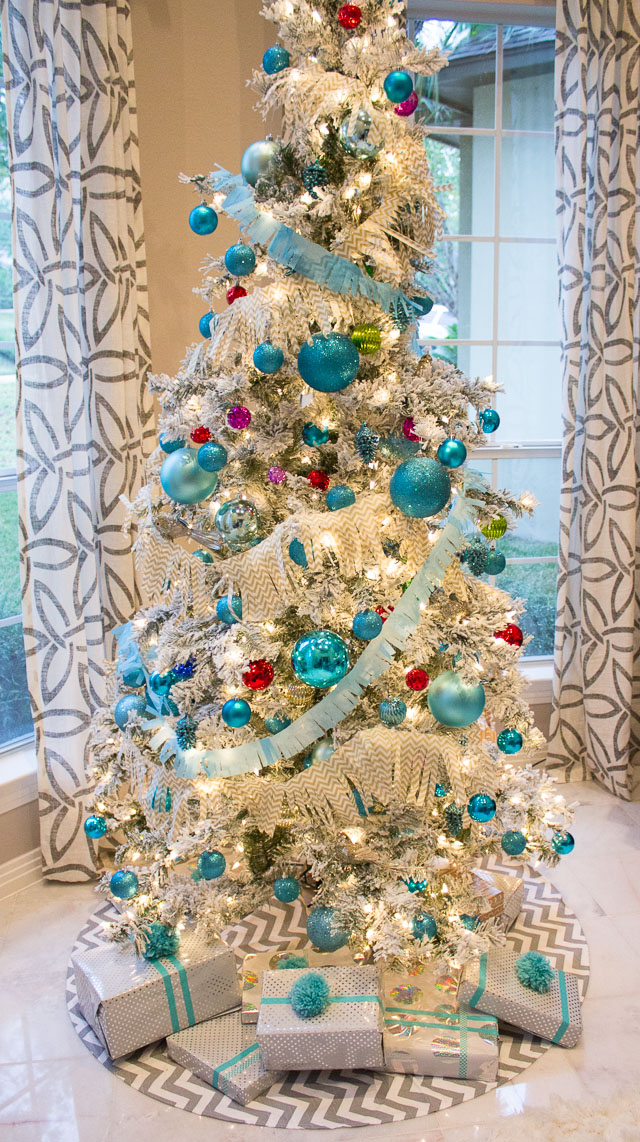
I have absolutely loved our flocked tree decorated in shiny blue ornaments and glittery birds. I just hadn’t had the opportunity to incorporate any DIY decorations into the tree like I always love to do, and I thought these garlands would be the perfect opportunity to do so.
I tried out a couple different lengths and chose a metallic chevron for one garland to match our tree skirt and stockings, and a light blue paper for the other. The long fringe reminds me of tinsel hanging from the tree.

When it comes to crafting, I’m a pretty low-tech gal but this fringe cutter is one gadget I’m excited to add to my repertoire. It automatically transforms tissue paper, mylar, and craft paper into fringe that can be used for garlands, tassels, and any range of party decor. These garlands are about as simple as it gets. Here’s what you’ll need.
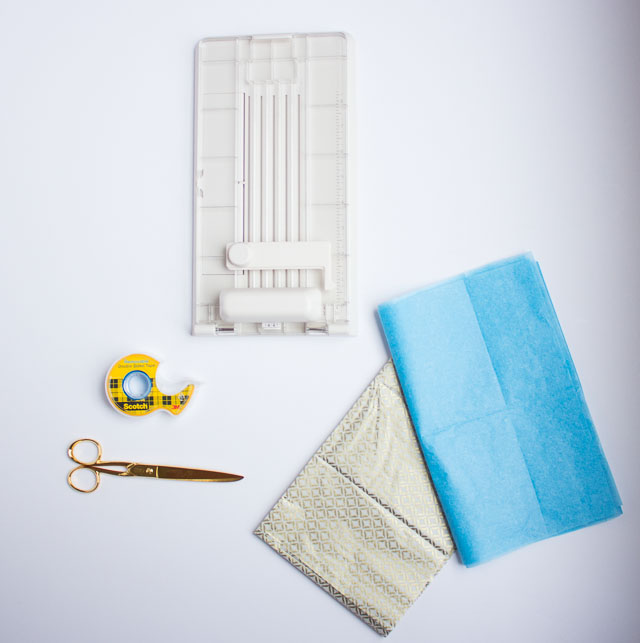
Supplies for DIY Paper Fringe Garland
- Martha Stewart Fringe Cutter or Fringe Scissors
- Tissue paper
- Scissors
- Double-sided tape
How to Make a Christmas Fringe Garland
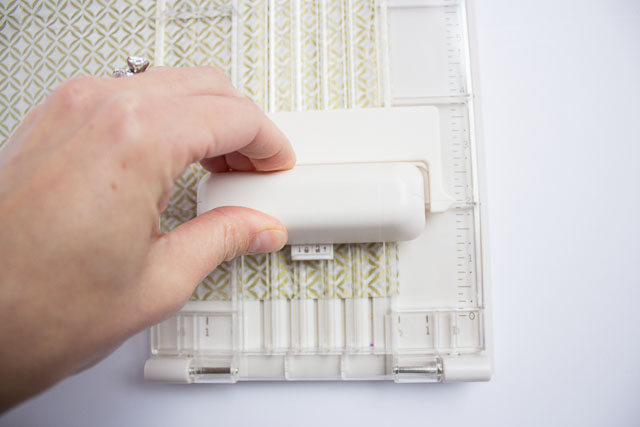
1. When you’re ready to make your garland, adjust the cutter to the length of fringe you want to make. You can make fringe as long as 8 inches with this tool. I used 5 inch fringe for my longer chevron garland and 2 inch fringe for the shorter blue garland. If you don’t have a fringe cutter, you can also use a pair of fringe scissors.

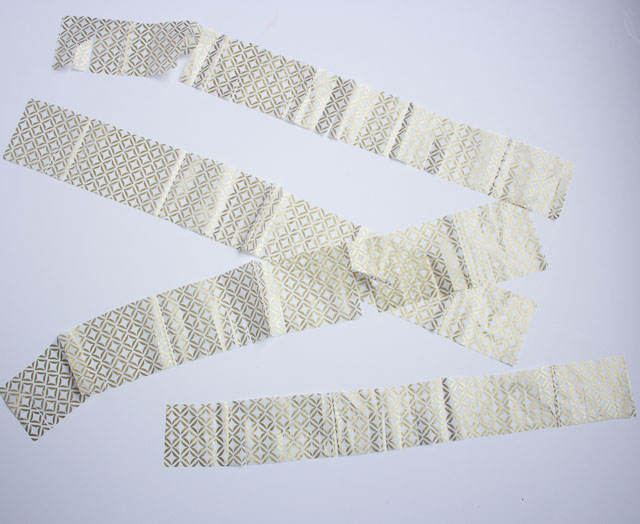
2. Take a piece of tissue paper and fold it in half horizontally and fold it again vertically. Place the tissue paper in the fringe cutter, lining it up according to the directions on the package and press down the lever to cut the fringe. Be sure to use your other hand to hold down the clear cover and prevent the tissue paper from moving underneath it while you cut the fringe.
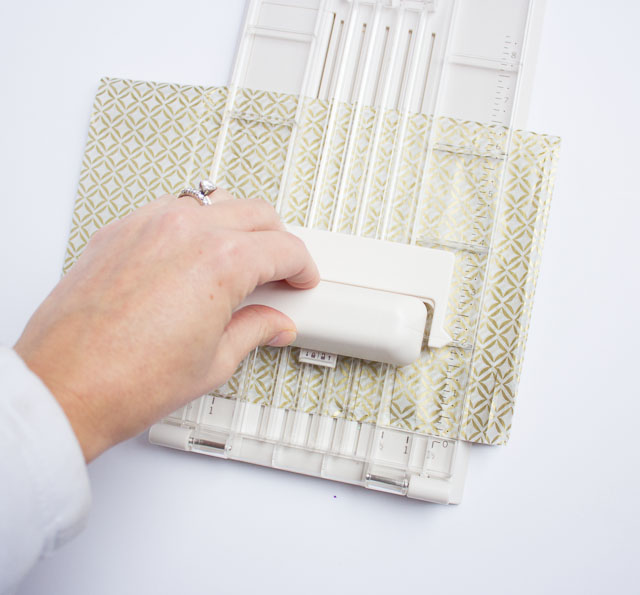
3. Open up the cover, move your tissue paper to the right and repeat the process to cut a new length of fringe. Continue this until you’ve cut the entire edge of the tissue paper.
4. Open up your piece of tissue paper. You’ll have fringe on the top and bottom. Cut off the fringe leaving about a 1/2 inch band across the top.
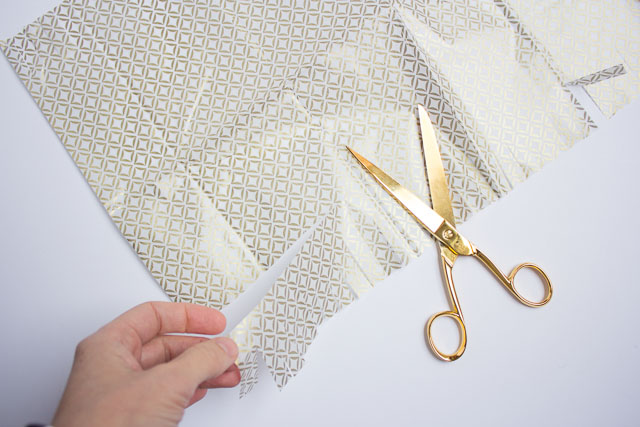
5. Repeat until you have several strips of fringe. You don’t have to be precise when cutting them – just eyeball it.
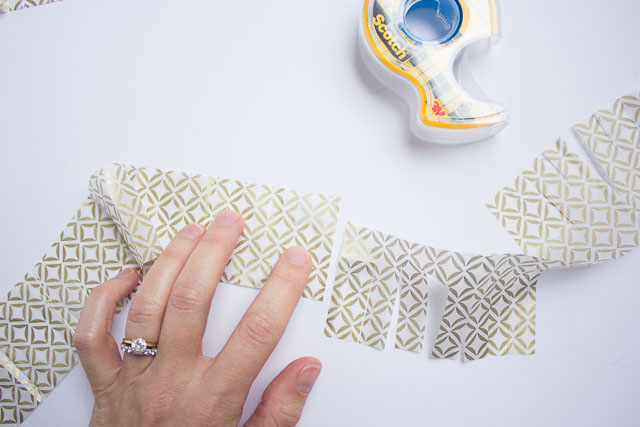
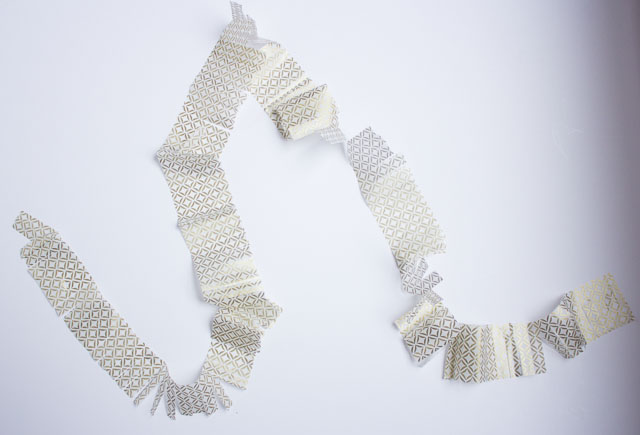
6. Finish by taping the strips together with a piece of double-sided tape.
7. Hang your garland from the tree!
Once you get the hang of the fringe cutter, it will literally take you 10 minutes to make a couple garlands for your tree.

Like this Christmas fringe garland?
Then don’t miss my other easy Christmas crafts!

This is post is sponsored by Martha Stewart Living Omnimedia as part of the #12MonthsofMartha program. All content and opinions are my own.